Description
- Brand Name: ZTTO
- Origin: CN(Origin)
- Model Number: Bicycle Brake
- Braking System: V Brake (Friction Wheel Brake)
- Components: Caliper Brake
- Material: Aluminum
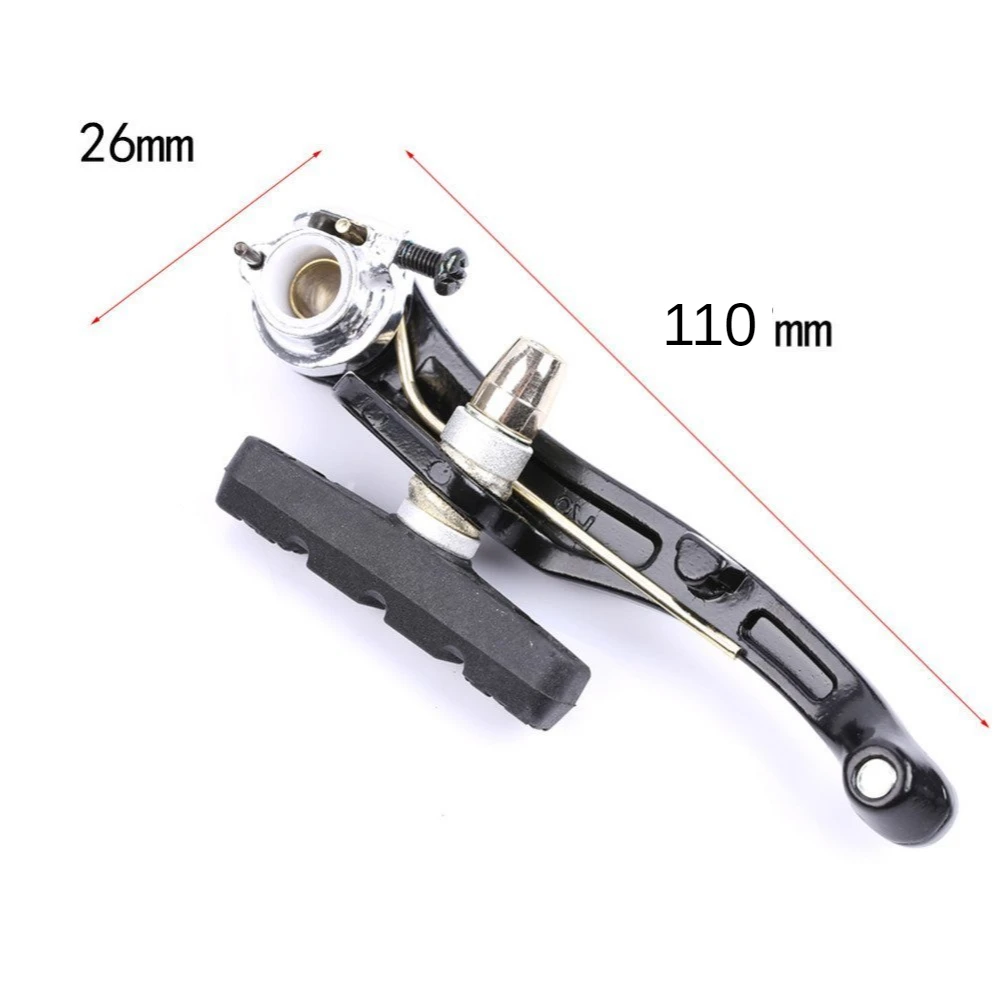
- Size: 11×2.6cm
- Name: ZTTO Bicycle Brake
- Feature 1: Bicycle brakes
- Feature 2: v brake pads
- Feature 3: MTB hydraulic brakes
- Model Number: zttovb1
- Size: vbrake
Length:110mm


Repair Help
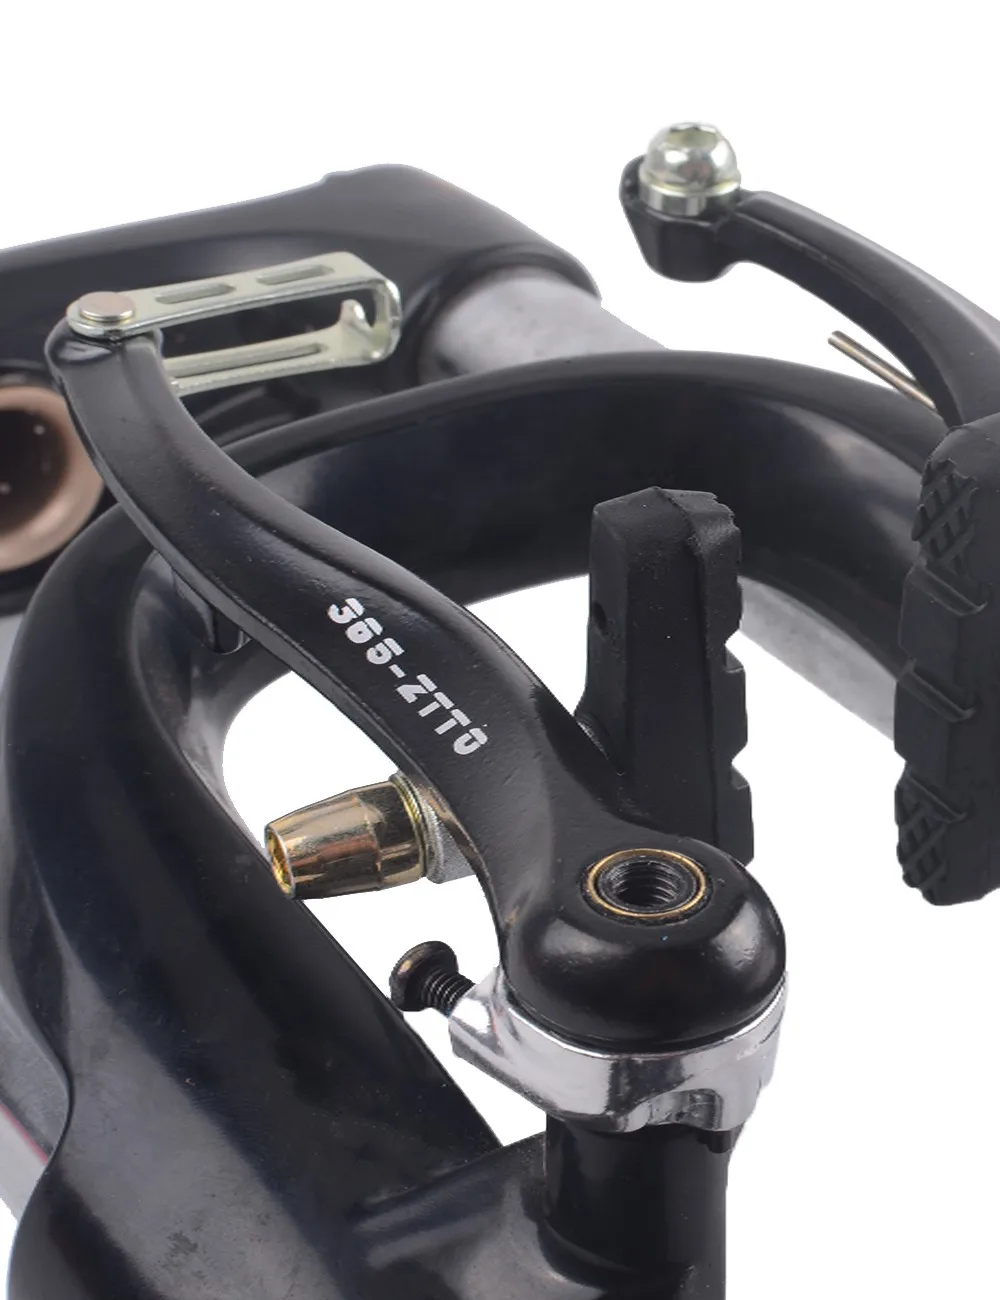
LINEAR PULL BRAKE SERVICE
This article will discuss linear pull style brake rim calipers. Caliper attachment to the frame, pad adjustment to the rim, and pad centering and clearance will be reviewed.
CALIPERS AND PADS
Linear pull brakes are a variation of "cantilever brakes." Each arm pivots on a frame fitting called a "braze-on." Like cantilevers, the pivots are located below the rim. The cable housing stops at one arm and the bare cable continues to a pinch bolt on the other arm. Pulling the cable then pulls the arms and brake pads to the rim.
If you are mounting the calipers to the bike, grease the outside of the frame fitting. Use care not to get grease inside the threads of the fitting Use a mild thread lockers inside the threads of the braze-on unless the mounting bolt already has a thread locker applies.
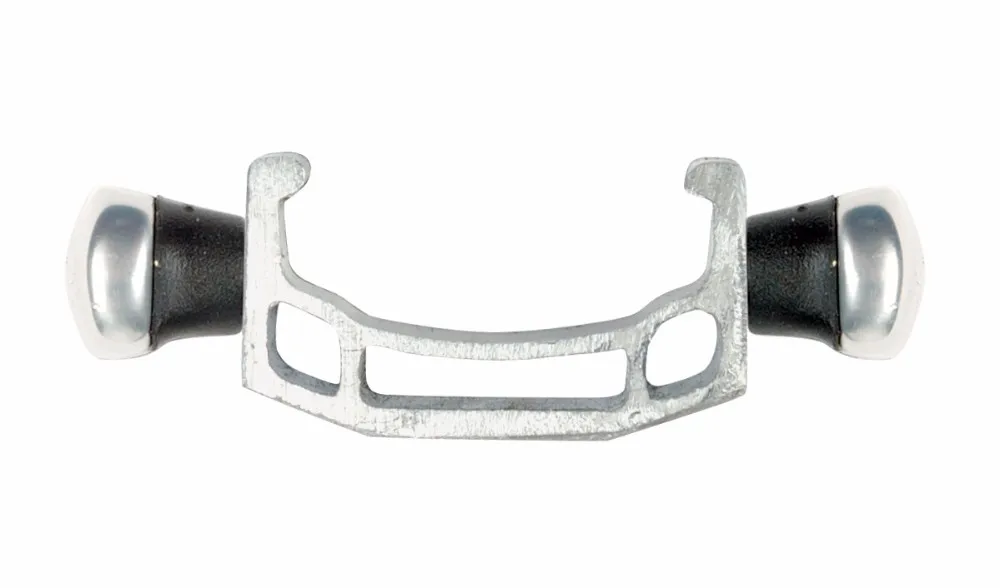
There may be three different spring hole options in the frame fitting. The middle hole is the common best location for the spring end. Be sure both sides are in symmetrical holes.
Thread in the mounting bolt and secure to manufacturers recommend torque, typically 7–8Nm.
Most models of linear pull calipers use a threaded stud brake pad. The bolt holding the pad is sandwiched to the caliper arm by a series of convex and concave washers, creating a "ball-and-socket" system. This permits the pad face to be rotated in several planes relative to the rim braking surfaces and then locked in place.
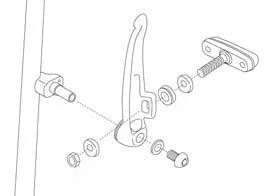
THREADED-STUD PADS USE CURVED WASHERS TO ALIGN PAD FACE TO RIM.
Brake pads should be correctly adjusted for vertical height alignment, tangent alignment, vertical face alignment and pad toe. Not every brand or model of brake caliper has every adjustment, and sometimes you must simply compromise when setting pads.
VERTICAL HEIGHT: Linear pull pads should be set to the top edge of the rim braking surface, but never so high the pads would touch the tire. The linear pull the arms toward the rim on an arc coming down as they approach the rim. As the pads wear and thin, they tend to travel further down the braking surface of the rim. Beginning as high as safely possible allows for more wear as the pad thins.
TANGENT: This is the setting of the pad tilt. Viewed from the side, the front and back of the pad should be level to the rim. One side should not be higher or lower than the other side. Use care when tightening the pad fixing bolt and hold the brake pad to keep it from twisting.

VERTICAL FACE ALIGNMENT: This is the setting of the pad vertical surface relative to the rim vertical surface. The vertical face of the pad should be set parallel to the face of the braking surface.
TOE ADJUSTMENT: Toe is a pad setting that tends reduce brake squeal. If the bike does not squeal when used, then toe is not necessary.
FRONT OF PAD STRIKES RIM FIRST FOR "TOE"
For a brake to be toed, the pad is angled so the pad’s front edge strikes first. This reduces the tendency of the arms to flex back and forth, creating a harmonic resonance, which is the squeal heard during some braking.
SETTING PADS
Before setting pads, begin by double-checking that the wheel is adequately centered in the frame. If the wheel is moved from current position, pad alignment will be affected.

1. Loosen pad nut/bolt and lubricate curved washers and thread. Adjust one pad to the rim at a time.
2. If desired, install rubber band shim at back edge of pad. This helps to set the toe.
3. Push the caliper arm to the rim and view pad alignment. Align pad correctly in four positions.
o Set the pad’s vertical height on rim braking surface.
o Set the pad’s vertical face to be parallel to the rim’s face
o Set front and back edge of the pad to be level to the rim, so it is tangent to the rim.
o If toeing with a shim, set it so the front edge and back edge with rubber band should be touching the rim at same time.
4. Tighten pad nut and remove rubber band. Inspect pad alignment again.
5. Repeat alignment of other pad.
Attach the inner-wire to the brake caliper. Secure the wire fixing bolt. Squeeze the lever hard several times and set pad clearance at the lever for rider preference. If the brake feels tight, turn the barrel adjuster into the lever clockwise to loosen inner-wire tension. If the brake feels too loose, turn the barrel adjuster counter-clockwise to tighten inner-wire tension. If barrel adjuster is all the way engaged at lever and the brake lever is still too tight, loosen the inner-wire pinch bolt and allow the slack to feed through pinch plate. Tighten the pinch bolt and test again, doing final adjusting at brake lever barrel adjuster.

USE BARREL ADJUSTER TO SET TIGHTNESS OF PADS TO RIM.
Inspect the pad centering to rim. Use a set screw on sides of caliper to center pads to rim. Tighten the set screw on the arm with pad that is closest to rim. Inspect that pads are not rubbing tire. Readjust if necessary. Clean the rim surface and test ride bike.
USE CENTERING SCREWS TO MOVE ARMS AND CENTER PADS TO RIM.