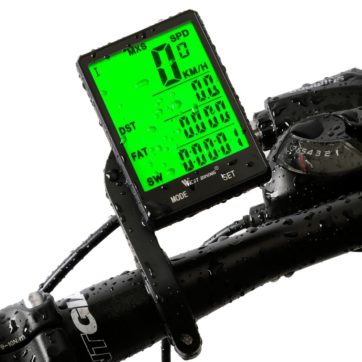
Description
- Certification: NONE
- Origin: CN(Origin)
- Stopwatch and Accessories: Waterproof Stopwatch
- Model Number: CX-9
- Version: Wired / Wireless
- Function: Stopwatch / Temperature Display / Calories
- Color: Green / White
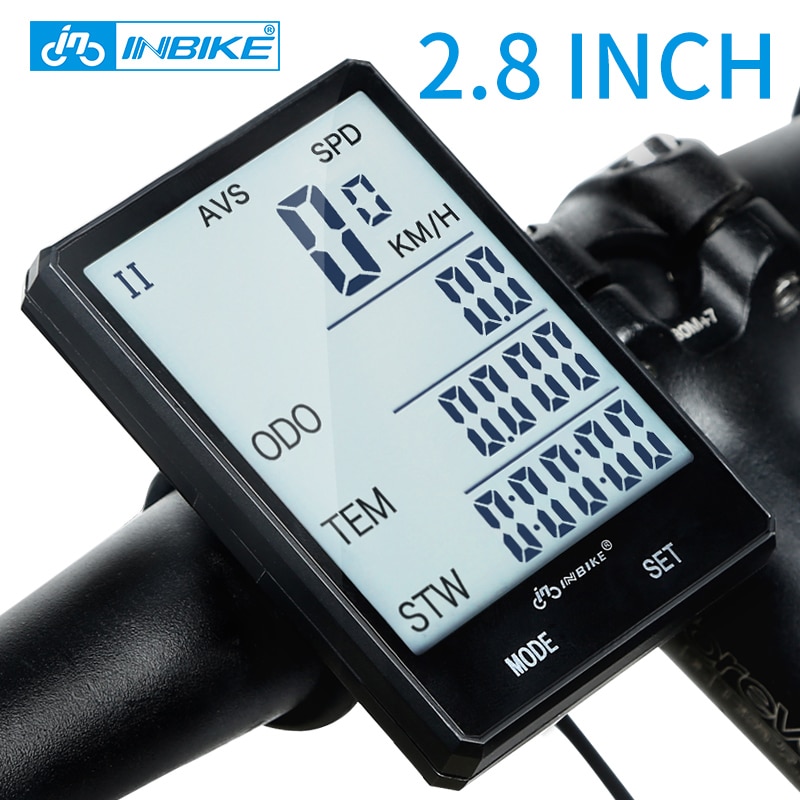
- Screen Size: 2.8 INCH
- Product Name: INBIKE Waterproof Bike Computer
- Application: Outdoor Bicycle Bike Cycling Riding


Product information:
Brand:INBIKE
Size:2.8 INCH
Model:Wired,Wireless
Waterproof:YES
Color:Black
Power supply:2030 battery
Backlight color:White,Green
Installation location:Handlebar
Application:Bicycle,Tricycle
Features:Backlight,Multifunction,easy to use, Lcd screen
PRODUCT FEATURES:
-2.8 INCH WIDE VIEWING ANGLE
FSTN MATERIAL,DATA CAN BE
SEEN CLEARLY FROM ANY ANGLE
-SMART CHIP ,STABLE PERFORMANCE
THE DATA WILL NOT BE LOST WHEN
POWER IS OFF,ACCURATE READINGS
-WATERPROOF
IPX6 WATERPROOF,IT WILL NOT
BE AFFECTED IN RAINY DAYS
-BACKLIGHT
IT IS CLEAR DAY OR NIGHT
-MULTIFUNCTION,EASY TO OPERATE
PRESS M KEY TO SWITCH
THREE INTERFACES FOR DIFFERENT
FUNCTIONS
-AVAILABLE FOR TWO BICYCLES
PRESS M KEY FOR 6 SEC TO SWITCH BETWEEN
1 AND 2
-AUTO STAND-BY,AUTO WAKE-UP
IDENTIFY OF BICYCLE MOVEMENT AUTOMATICLY,
POWER-SAVING(NEED TO TOUCH THE KEY IF
WIRELESS TYPE )
-LASTING ENDURANCE,
LOW POWER CONSUMPTION
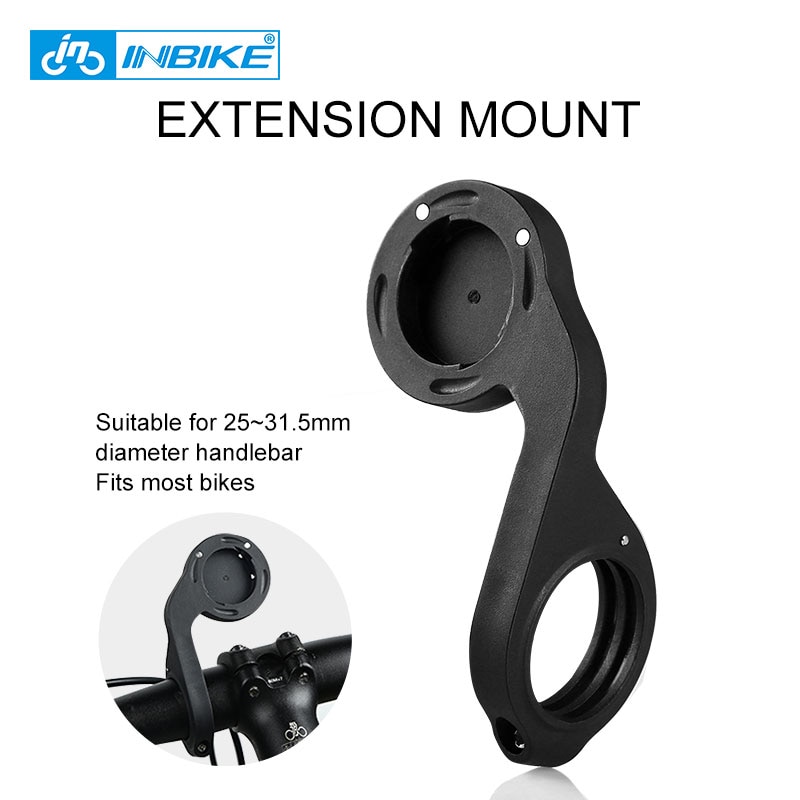
-EXTENSION MOUNT DESIGN
EASY TO READ,MORE SCIENTIFIC PER
SPECTIVE FOR RIDING


2.8 inch FSTN screen
Adopt FSTN material. You can read the data clearly from any angles.
Compare size with Band card

Compare size with band card
2.8 inch HD screen, easy to read data

Artificial intelligence chip
Save the data even the power runs out

Daily Waterproof
Do not put the product into water or get wet in the rain for a long time.
Cover a plastic warp when there is a bad weather.

Backlight function
It is clear both at day and night
Press the left and right botton to trigger or turn off the continuous backlight.
Press any button for 4-second backlight.

Powerful function, easy to operate
Press "M" button to switch three interfaces. Lots of functions.

Two sets of data records
Can be used in two bikes at same time. Press M button for 6 seconds to switch.

Automatic standby mode and wake automatically
Identify the bike movement automatically and save electricity. (As for wireless version, you need to press button to wake it.)
When no movement, it will be in standby mode automatically to save electricity.

Long battery endurance
only need one 2033 battery
(use a coin to open the cover)

Upgraded Version(Two methods of use)
The upgraded version comes with a free base.
The upgraded version can be used with an extension mount or it can be directly mounted on the handlebar using the base.

Extension mount
easy for you read data (only extension mount version has extension mount)


Product configuration
Wired version
wired launcher and base*1/nylon belts*6/2032 battery*1/magnet*1/sponge pad*2/user's manual*1/computer*1

Wireless version
wireless launcher and base*1/nylon belts*6/2032 battery*1/magnet*1/sponge pad*2/user's manual*1/computer*1

Wired extension mount version
wired launcher and base*1
wired extension mount*1
computer*1(inner with battery)
magnet*1
nylon belts*6
sponge pad*2
user's manual*1

Wireless extension mount version
wireless base*1
wireless launcher*1
wireless extension mount*1
computer*1(inner with battery)
nylon belts*6
magnet*1
sponge pad*2
user's manual*1

Magnet and launcher installation
Two types are different. Please pay attention.
Wired bike computer
Magnet is fixed by screw. The distance between magnet and launcher should be 1.5~5mm. The head of magnet should be aligned with the upper or lower ends of the launcher.

Wireless bike computer
1. The distance between wireless launcher and computer should be within 60cm. So that computer can receive the signal and work normally.
2.The distance between magnet and launcher should be within 3mm.
3.The magnet should be placed like this picture.

Extension mount installation
1.Install the extension mount
Unlock the buckle and put the mount on the middle of the handlebar. Adjust angle and screw it tight.(If the handlebar is thin, please put the long rubber spacer.)

2.Install the extension mount
Insert the computer to the extension mount buckle. Push hard to the end. It is finished when you hear sound. (If you don't install the computer in a right position, there will be no data display.)

Wired bike computer installation
1.Fix the base on the handlebar
2.Install the computer on the base
3.Put the wire down
4.Fix the magnet on the spoke
5.Fix the launcher on the fork (the distance between magnet and launcher should within 3 mm.)
6.Finish the installation and start to use it.

Wireless bike computer installation
1.Fix the base on the handlebar
2.Install the computer on the base
3.Fix the magnet on the spoke. Don't screw it tight in order to adjust it later
4.Fix the wireless launcher through nylon belt
5.Adjust the distance between magnet and launcher. It should be 3mm. When it is over 3mm, adjust magnet position and screw tight.
6.Finish the installation and start to use it.

Base disassembly instruction
Take off the screws. Change the direction so that you can install horizontally or install vertically.

Product packaging:
Step 1: Check the quality of the product
Step 2: Pack the product with bubble paper
Step 3: Packaging with express bags
Step 4: affix the buyer's address and affix "FRAGILE" to protect the package.
(Note: Due to the long transportation time, if there is any problem with the product during transportation, please contact us in time, we will give you the best answer 🙂


